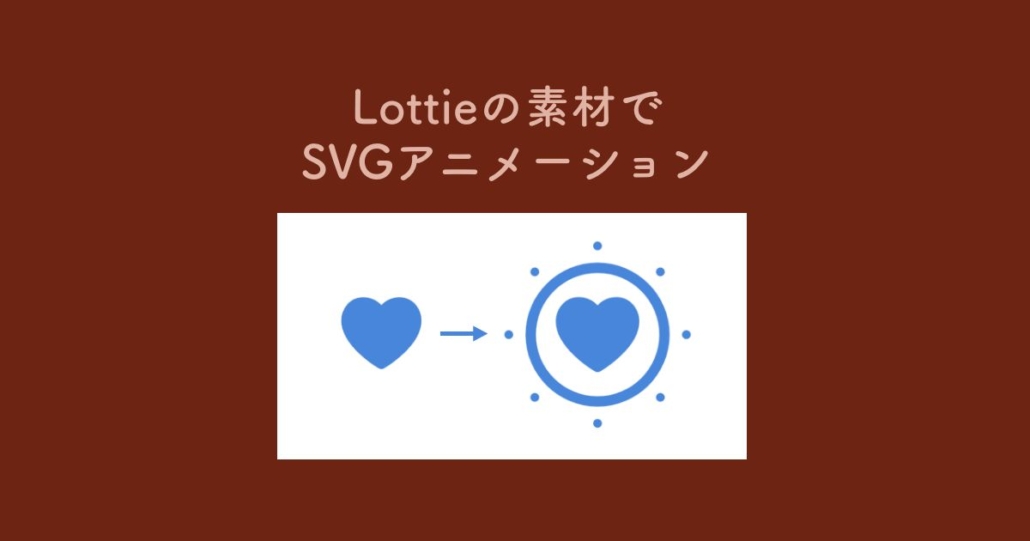
Lottieのフリー素材でSVGアニメーションを実装してみた(備忘録)
今回はLottieのフリー素材でSVGアニメーションについてまとめてみた。
素材は、LottieのFree Ready-to-use Animationsの一覧にあるものを使用している。
それでは実装に入っていく。
Lottieとは?
CSSやJavaScriptなどのコードを自分で書かずに簡単にアニメーションが実装できるのが特徴。
json形式のデータのため、gif、pngに比べて軽く、SVGを使用しているので拡大縮小しても劣化せずに使える。
下記がLottieの公式になる。
LottieFiles – Download Free Lottie Animations, Integrations & Plugins
Googleアカウント等で無料で登録できる。
フリー素材を使用するには、添付のFree Ready-to-use Animations部分をクリックして一覧から探していくことになる。
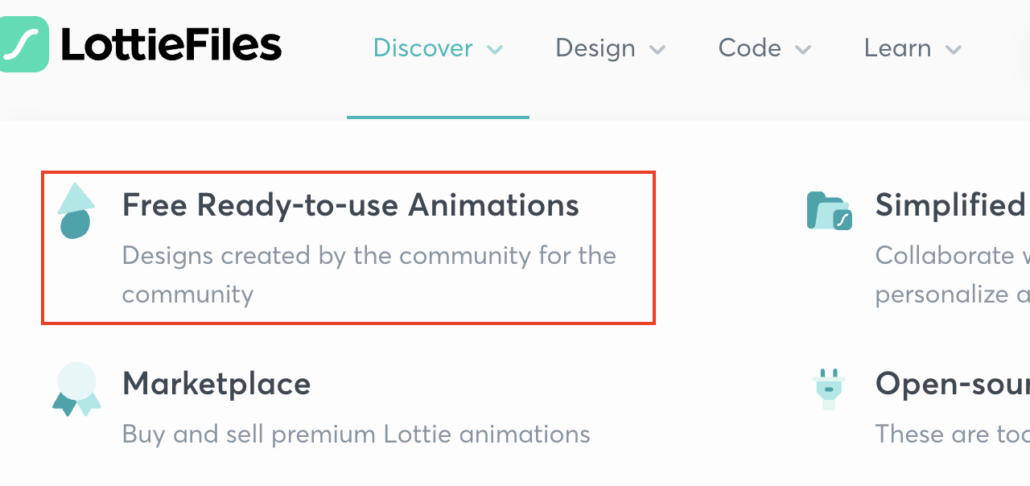
Featured animations from our community
Lottieの素材からhtmlへのアニメーション追加方法
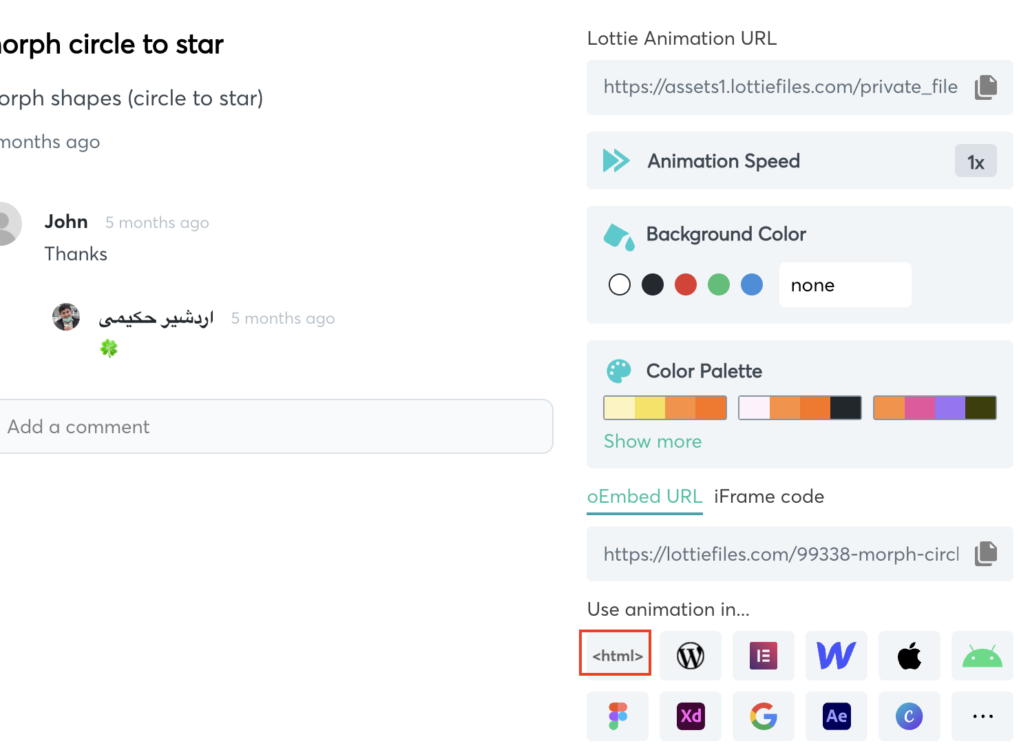
自分が入れたいアニメーションをクリックすると、添付の項目が出てくるので<HTML>をクリック。
※ちなみに、ここでアニメーションのスピードや背景色なども変更できる。
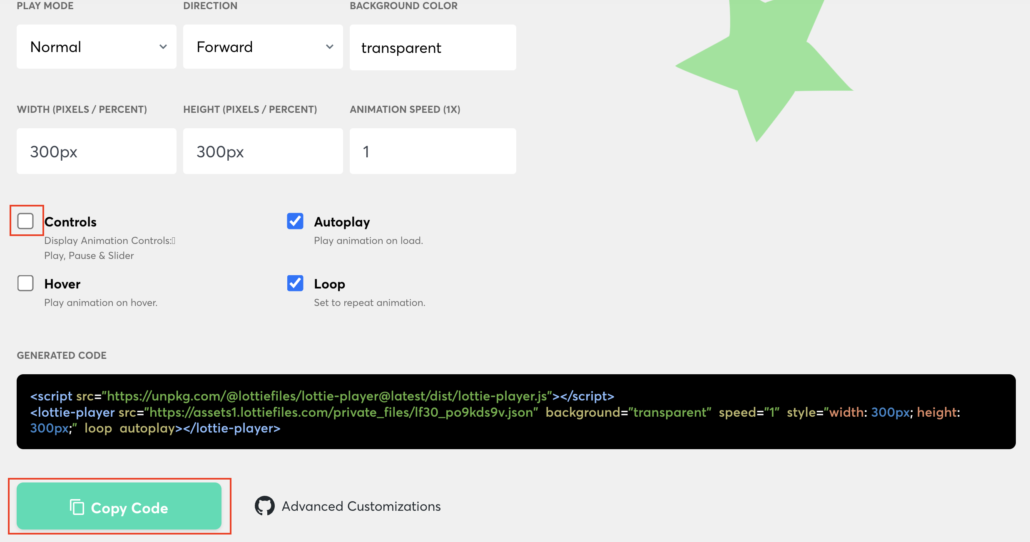
続いて添付の画面のControlsのチェックを外して下側にある再生メーターを削除し、Copy Codeをクリック。
※ここでも再生モード、方向など色々調整ができるので、どんなことができるのか試してみるといいかと思う。
このコピーしたコードを自分で用意したHTML側に貼り付ければOK。ただ注意点として、styleで指定されているサイズの部分は削除しておくことをおすすめする。これはCSS側で指定することが多いためだ。

これで実装ができるようになるが、他の色変更などのカスタマイズ方法も紹介していく。
Lottie素材のカラーを変更する場合の手順
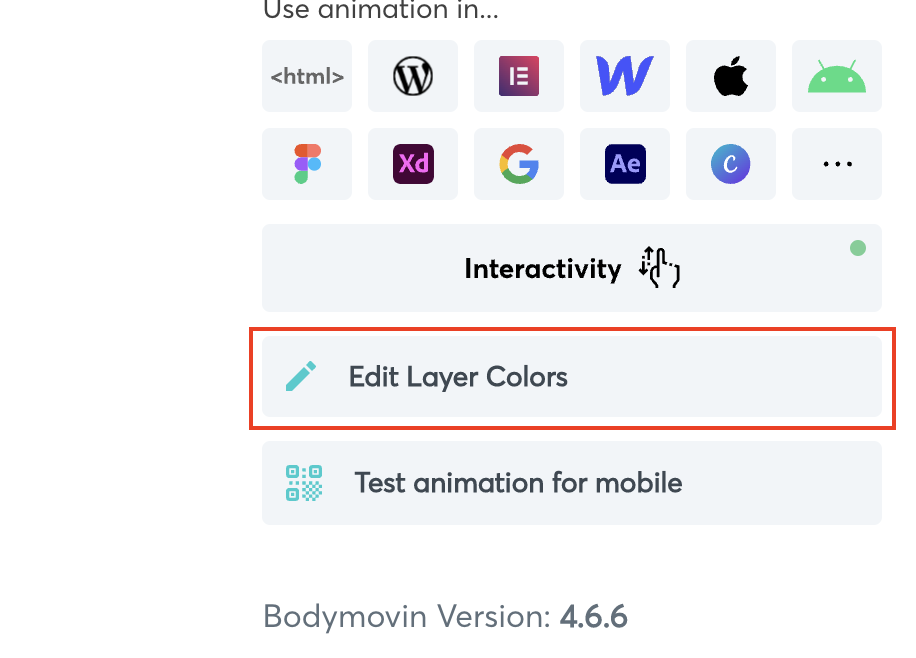
Free Ready-to-use Animationsの一覧からカラーを変えてみたいアニメーションをクリックして選ぶ。Edit Layer Colorsという項目があるのでクリック。
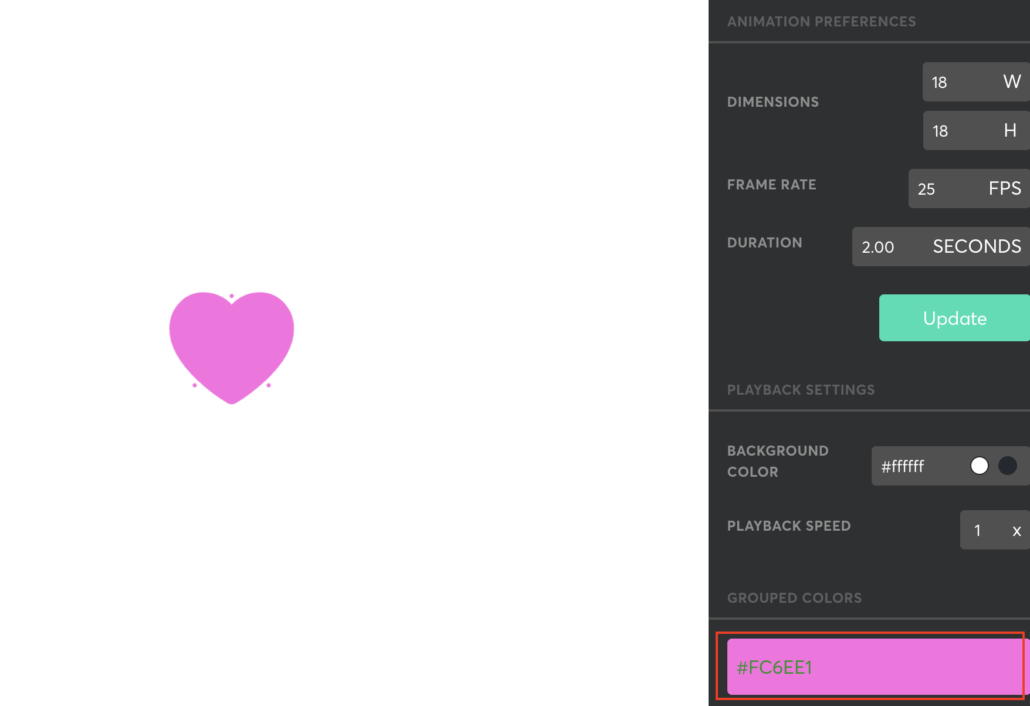
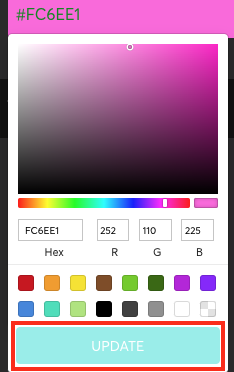
すると右側にGROPUED COLORSという項目があるので、そこから任意のカラーを選びUPDATEをクリック。
※一部のカラーを変えたい場合は、左側のLAYERSからそれぞれのレイヤーを選択してカラーを選ぶ。
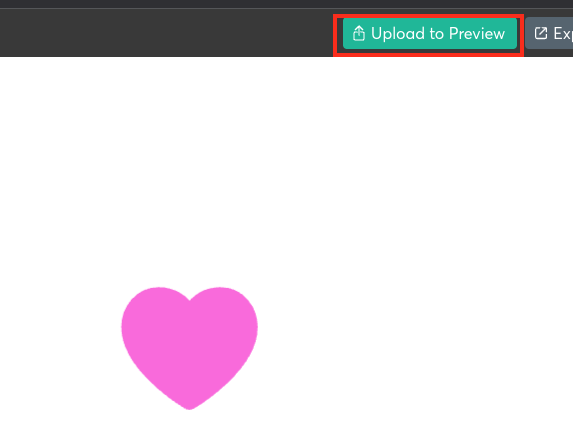
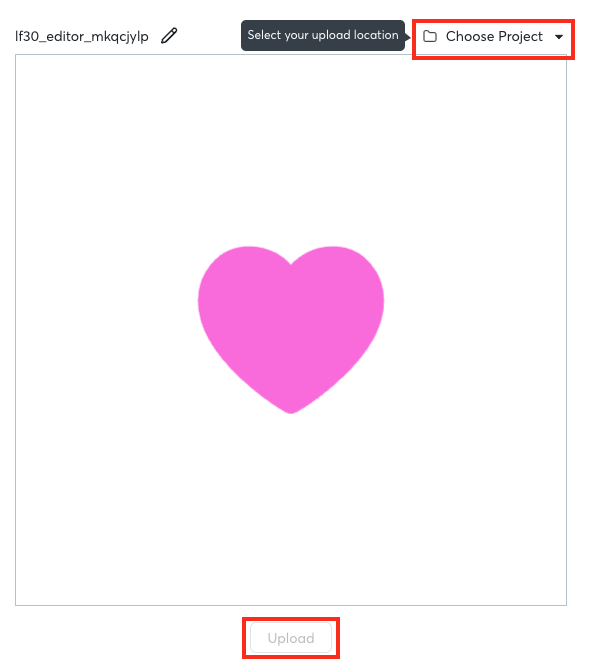
準備ができたら、上部にあるUpload to Previewをクリック。
右上のChoose Projectをクリックし、自分のアカウントを選択し、下部のUploadボタンをクリック。
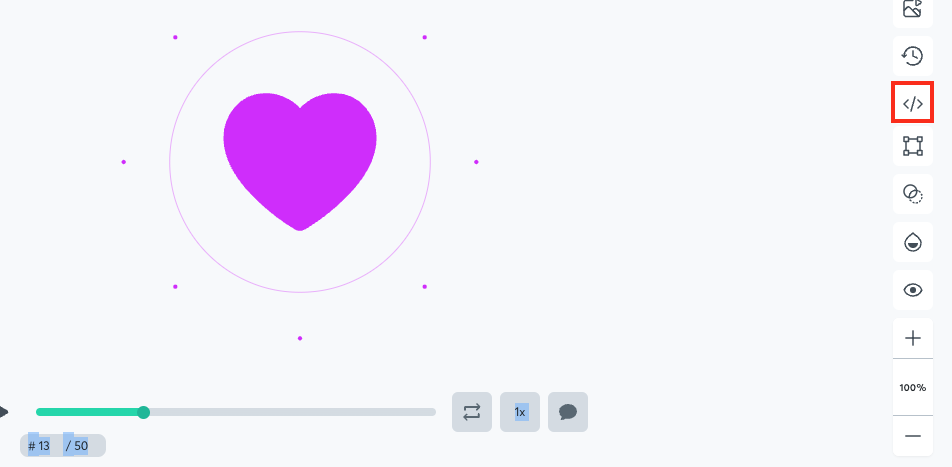
該当アニメーションの右側にある</>をクリック。
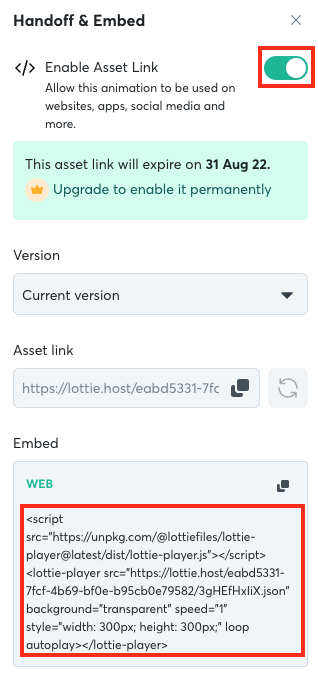
Enable Asset Linkをオンにして、下部のコードをコピーし、HTML側へ貼り付ければ作業完了だ。
それではデモの実装に入っていきたい。
HTMLの記述について
<!DOCTYPE html>
<html lang="ja">
<head>
  <meta charset="UTF-8">
  <meta name="viewport" content="width=device-width, initial-scale=1.0">
  <title>Lottieのフリー素材でSVGアニメーション</title>
  <link rel="stylesheet" href="../reset.css">
  <link rel="stylesheet" href="style.css">
</head>
<body>
  <main>
    <section>
      <div class="ly_mainvisual">
        <img src="img_mainvisual.jpg" alt="MV">
      </div>
    </section>
    <section>
      <div class="ly_inner" id="title1">
        <h2>Lottieのフリー素材で色々やってみる</h2>
        <div class="ly_svgWrap">
          <script src="https://unpkg.com/@lottiefiles/lottie-player@latest/dist/lottie-player.js"></script>
          <lottie-player src="https://assets1.lottiefiles.com/private_files/lf30_po9kds9v.json" background="transparent" speed="1" loop autoplay class="svg_freefuntimes"></lottie-player>
        </div>
        <div class="ly_svgWrap">
          <script src="https://unpkg.com/@lottiefiles/lottie-player@latest/dist/lottie-player.js"></script>
          <lottie-player src="https://assets6.lottiefiles.com/packages/lf20_kgotdjba.json" background="transparent" speed="1" loop autoplay class="svg_freefuntimes"></lottie-player>
        </div>
        <div class="ly_svgWrap">
          <script src="https://unpkg.com/@lottiefiles/lottie-player@latest/dist/lottie-player.js"></script>
          <lottie-player src="https://assets9.lottiefiles.com/packages/lf20_5z2ghqbf.json" background="transparent" speed="1" loop autoplay class="svg_freefuntimes"></lottie-player>
        </div>
        <h2>色変更の例</h2>
        <div class="ly_svgWrap">
          <script src="https://unpkg.com/@lottiefiles/lottie-player@latest/dist/lottie-player.js"></script>
          <lottie-player src="https://lottie.host/eabd5331-7fcf-4b69-bf0e-b95cb0e79582/3gHEfHxIiX.json" background="transparent" speed="1" loop autoplay class="svg_freefuntimes"></lottie-player>
        </div>
      </div>
    </section>
  </main>
</body>
</html>
SVGの部分は下記にあたる。これが4パターン記載されているだけだ。手順は先述しているので解説は省略する。
<script src="https://unpkg.com/@lottiefiles/lottie-player@latest/dist/lottie-player.js"></script>
<lottie-player src="https://assets6.lottiefiles.com/packages/lf20_kgotdjba.json" background="transparent" speed="1" loop autoplay class="svg_freefuntimes"></lottie-player>
CSSの記述について
@charset "utf-8";

/* ==========================
  初期設定
========================== */
*,
*::before,
*::after {
  box-sizing: border-box;
}
img {
  width: 100%;
}
body {
  background-color: #ddd;
}

/* ==========================
  SVGアニメーション
========================== */

/* svg共通 */
.ly_svgWrap {
  text-align: center;
}
.svg_freefuntimes {
  width: 600px;
  height: auto;
  max-width: 100%;
  margin: auto;
}
.ly_svgWrap + * {
  margin-top: 20px;
}

/* ==========================
  コンテンツの中身
========================== */
.ly_inner {
  width: 1080px;
  max-width: 100%;
  margin: 100px auto;
  padding: 20px;
}
.ly_inner h2 {
  font-size: 150%;
  font-weight: bold;
  margin-bottom: 30px;
}
.ly_inner h3 {
  font-size: 110%;
  font-weight: bold;
  margin-bottom: 10px;
}
CSSも特段難しいことはしていない。
このように、Lottieは特に難しいコードを書かなくても手軽に実装ができるのがメリットだ。
あまりに複雑なアニメーションは難しいが、Free Ready-to-use Animationsで紹介されているアニメーションに近いものであれば、IllustratorやAfter Effectsを使って自作することもできる。
自作方法については、また後日紹介していけたらと思う。
以上で実装完了となる。
今回はJavaScriptは用いていないので、これで終わりだ。

